How to add Document Titles and Meta Descriptions to your WordPress site
In this article, I’m going to show you show to add Document Titles (also known as HTML titles) and Meta Descriptions to your WordPress site. In this example, I’m going to be demonstrating this with the Yoast SEO plugin. It’s our go to plugin for managing search optimisation on WordPress sites. If you’re using another tool…

In this article, I’m going to show you show to add Document Titles (also known as HTML titles) and Meta Descriptions to your WordPress site. In this example, I’m going to be demonstrating this with the Yoast SEO plugin. It’s our go to plugin for managing search optimisation on WordPress sites. If you’re using another tool the mechanics may differ slightly.
I’m assuming that you have already spent some time thinking about your keywords and mapping them to the URLs in your WordPress site.
Get started in the WordPress editor
Regardless if you’re working with a page or a post (or even a custom post type) the process is the same. Begin by editing the page (or post etc.. ), then scroll down below where the editor shows the content.
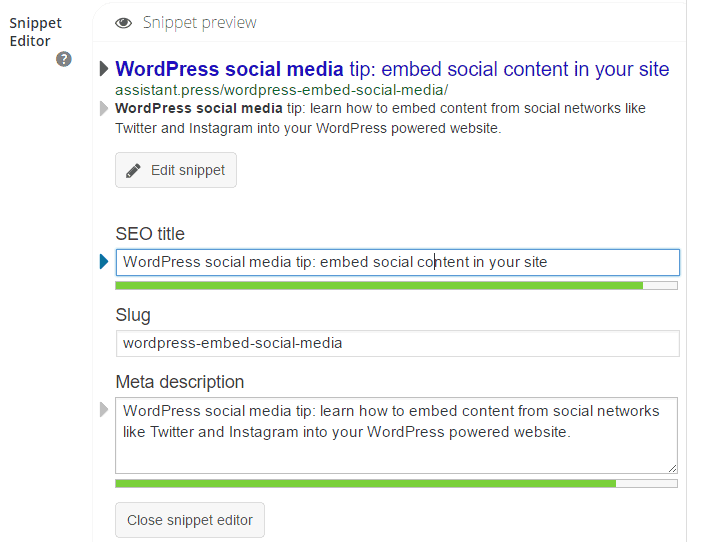
Here you’ll see the Yoast SEO setting meta box, see the screen show below. It will show you the current document title and meta description. If you have not already created these it will default to the page title and the first sentence or two from your content.
Click the “edit snippet” button here and you’ll be presented with an editing tool.

As you can see in the below screenshot, there is one field for the document title (SEO title) and another for the meta description. The editor has a nice user interface that shows you when your text is the correct length. Below you can see that my title has a green bar below it, the length is fine. If it turns red then you need to shorten your text, it will be truncated when displayed on Google if you leave it too long.
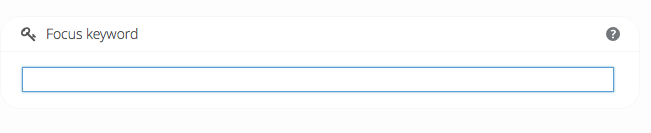
Setting your focus keyword
If you’re following along the SEO Boot Camp series you would have competed my method for setting up keywords for each of your URLs (webpages) in a spreadsheet. The keyword that you have selected for each page should be saved in the Yoast tool too. Below where you’re working now you will find another field “Focus Keyword”.
At this stage, click the ‘Update’ button in the editor to save the page.
Further Optimise Your Content
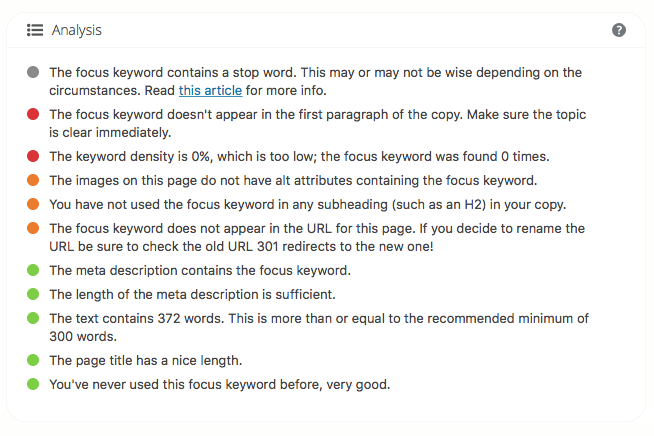
Now, you could stop there. Setting a document title and a meta description for your page is a good move forward for your SEO rankings. However, based on what you have setup so far, the Yoast plugin will guide you on further operations that you could do to further optimise this page.
No SEO genius required. Just follow the tips that are presented. Try and get as many green lights as you can.
When you’re done, save your page again. Move onto the next page and hopefully work your way through all of the pages, posts and other content in your website. Importantly, you need to also follow this process when you create something new for your site.
This article is part of a series that we are publishing during April for those signed up to our WordPress SEO Boot Camp.
Reader Interactions